Step One
Download P-NUCLEO-53L7A1 GUI Software
Download the free P-NUCLEO-53L7A1 GUI from STMicroelectronics. Please follow all instructions on STMicroelectronics site to download the software.
*Available for Windows 10 and up
Once downloaded to your computer:
- Extract the folder STSW-IMG037 to a location on your computer.
- Double-click the VL53L7CX_Installer found inside the folder to install it.
- Follow all instructions in the installer.
Step Two

Connect the KST3277-KIT1 Together
- Connect the KST3281 Shield to the STM32F401 Nucelo-64 Board.
- Connect the KST3277 Distance Sensor Cap to the CTR (Center) connector on the KST3281 Shield.
-
Connect the Mini USB Cable to the STM32F401 Nucelo-64 Board.
- Connect the other end to your computer.
- With the VL53L7CX Software open:
- You should be on the About tab.
-
Click the Refresh List button and then the Connect
button.
If you have multiple COM ports, please select the correct one
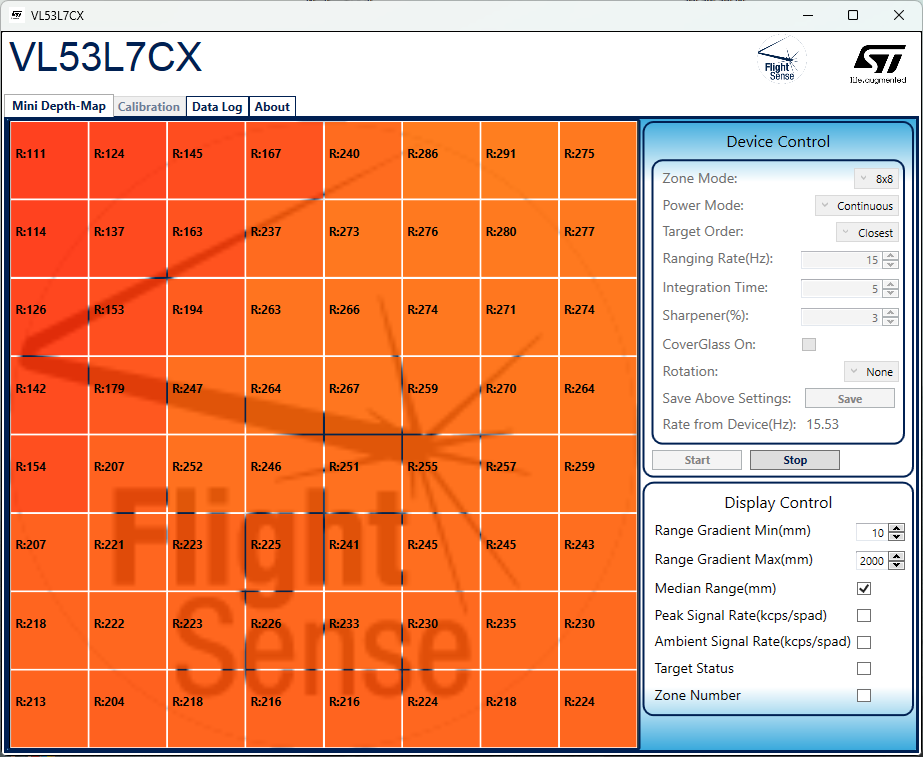
Step Three
Ranging
- Click on the Mini Depth-Map Tab
- On the right hand side, under the Device Control section, click the Start button to start ranging right away.
-
Move the KST3277 Distance Sensor Cap around and see what is detected.
There is a 3.5 meter max range
- Device Control & Display Control Options
- See the SW User Manual under the About Tab for more infomration.